=”1″ =”4.19.0″ custom_margin=”0px|0px|0px|0px|true|true” custom_padding=”0px|0px|0px|0px|true|true” =”{}” ]
So… I have no idea how panipopo – those decadent buns soaked in sweet, velvety coconut cream – became a Samoan thing.
I know that bakeries in Samoa are amazing, and have been for ages. Even my grandparents talked about getting up before the sun, seleni (shilling) in hand, to buy a fresh loaf of bread and rush it home, still piping hot.
I also know that luscious coconut cream…? Grated coconut meat, twisted and squeezed into liquid, through a husk fibre strainer…? Now that stuff is the nectar of the Polynesian gods.
It wouldn’t have taken long for some brilliant islander to start dipping steamy hot bread into sweetened coconut cream and then be floored by the mother of all lightbulb moments.
But whatever its origin story is (and if you actually know it, please share in the comments below), not many dishes are more iconically Samoan than the beautiful panipopo.
In my extended family, the ability to make good, authentic pagipopo (like they made it back in the old days) is a serious status symbol. My aunt is known around the family circles as the best pagipopo maker, but I have an older cousin who swears he taught her the recipe… and apparently, he got it directly from my grandfather. Oka!
So after I mastered the art of eating pagipopo, the obvious next step for me was learn how to make them. A few years ago, I went to my aunt. She made me swear a vow of secrecy then spent the whole day showing me – step by step – how to make her treasured pagipopo.
Over the next few months, I practiced and practiced (and ate and ate) and got pretty good at making them… and then I posted my aunt’s panipopo recipe on One Samoana.
I know I know… it’s supposed to be secret, but I had to do it!
Only cause back then most of the panipopo recipes online were posted by non-Samoans whose instructions were basically:
- Buy some dinner rolls
- Dip in coconut milk…
I felt like it was my duty as a Hamo Geek Girl to share an actual Samoan family’s old, authentic recipe for real panipopo.
The response to my original panipopo article was a lot of fun to read. For the most part, people loved it. Check out some of my favourite comments from back then:
Wow. Perfect, perfect, perfect! ‘O le panipopo mo’i lea!
I swear, when you try to tell the people who’ve served the ‘not as mama used to make panipopo’ and they tell you ‘Eh, ‘o le mea mo’i!’–it makes you crazy!
And, now… I am the Mastah Panipopo–hee, hee, hee. Thanks A LOT for the post, you gave me my panipopo sanity back; I knew my childhood taste-buds wasn’t lying.
just had to post up again!! so i made another batch and it went over so well, people actually think i do this on a regular basis!! this recipe has my boyfriend’s family LOVING me right about now!! thank you!! lol!! who knew that panipopo could create such reputation yeah?? lol!! Big faafetai’s to you and especially your auntii!! i hope you post up some more soon!!
SUCCESS!! Everyone loved it & I am super stoked to be able to FINALLY make this from scratch for my family to enjoy. I knew the pagi popo others were making didn’t seem right and it is because they used pre-made dough or frozen dinner rolls. Thanks so much for sharing your wisdom with us!
Yes. I know. I’m pretty cool.
BUT, I also had a lot of people (mostly offline, to my face) complaining that I didn’t include any actual measurements. They were like, but how can I make something if you don’t tell me how many actual cups of flour to use? Or how many exact teaspoons of yeast? And what exact size the pan should be?
And I was like… well, my aunt didn’t give me exact measurements either. What do you want me to do?
It really is about practice. I’ve made pagipopo so many times (you can tell from my pagipopo abs) that the process is pretty automatic to me now.
I still use coffee mugs of flour, heaped up just past the rim. I still add just enough butter so the mixture feels silky all rubbed between my fingers. I still stir in just enough warm water so that the batter is thick but jiggly. Are those not accurate measurements?
I get it, though. Not everybody is a fai mea palafu – I mean, a natural – in the kitchen like me. And even I get this pagipopo recipe wrong sometimes, like when I’m distracted and forget a step. And sure, writing the recipe down will help everyone to get more predictable results… So I finally gave in.
I’ve just spent the last couple days making pagipopo – refining things, getting my house to taste-test and critique, eating way more of those yummy pagi than I should (it’s for science) – to finally get you some actual, palagi-style measurements.
Now everyone can give this recipe a go:
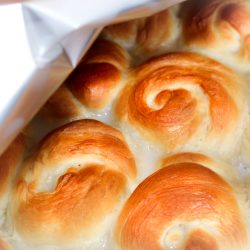
Authentic Samoan panipopo (coconut buns)
Ingredients
The Panipopo Dough
- 4 cups plain flour to begin with
- 1 teaspoon salt
- 50 grams butter
- 3 tablespoons white sugar
- 3 teaspoons active dry yeast
- 1 cup warm water to dissolve the yeast
- 2-3 cups warm water to incorporate the batter
- 2-3 cups plain flour additional, for kneading
The Coconut Cream Sauce
- 1 can coconut cream (or 425ml fresh coconut cream, if you're lucky enough to have it)
- 2 tablespoons plain flour for thickening
- 1 cup white sugar
Instructions
The Bun
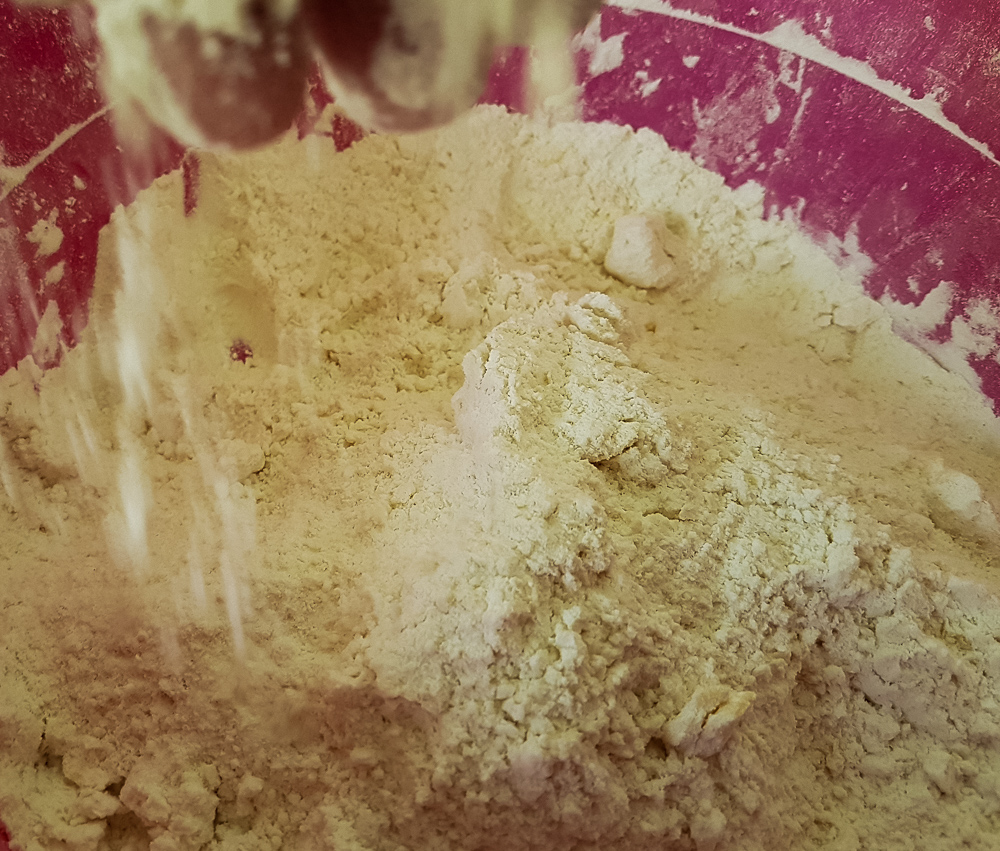
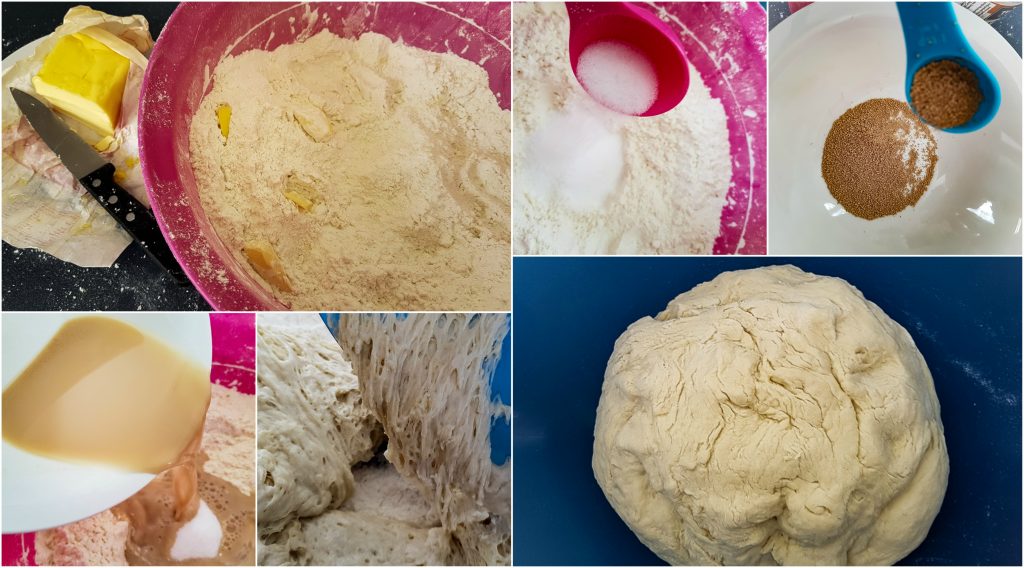
- Making the batter is so easy. Start by dumping your four cups of flour into a large bowl, add the salt and then rub in the butter until the flour feels 'silky' and gets a little bit clumpy. Then make a well in the middle of the bowl and chuck your sugar in there.
- Time to work on the yeast. Put your 3 teaspoons of yeast into a smaller bowl (that's not made of plastic). Slowly add a cup of very warm water and stir until the yeast is dissolved... sometimes I get in there with my fingers to help the dissolving process.
- Next, pour the yeast-water into the flour mixture - into the well with the sugar. You should see the yeast begin to bubble up as it makes contact with the sugar.
- And then you just grab a wooden spoon and fold the flour into the liquid - mix it all up - adding more warm water (2 to 3 cups) until it becomes a thick batter that still jiggles a bit when you shake the bowl.
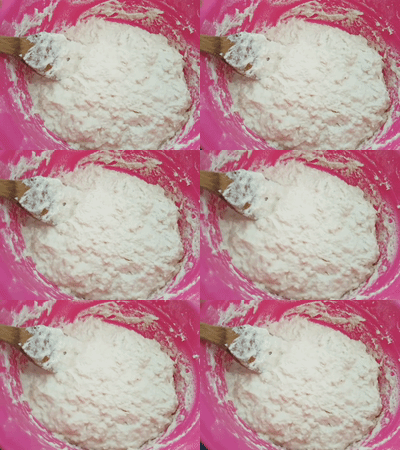
- Cover the bowl lightly with a clean towel or baking paper and leave it in a warm, dry spot to rise for 2 hours.
- When you come back to the dough, it should have doubled in size with lots of holes in it. Spread 2 cups of fresh flour out on a clean counter, then pour the sticky, hole-y batter on to it. Then you're going to fold the new flour into the dough and knead it until it's a lot less sticky because it's absorbed almost all of the flour. (This shouldn't take much more than 5 minutes).
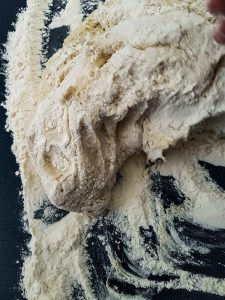
- When you've got a dough that's a lot more solid than batter, easier to hold but still a little bit sticky, chuck it back in the bowl and cover again for another round of rising.
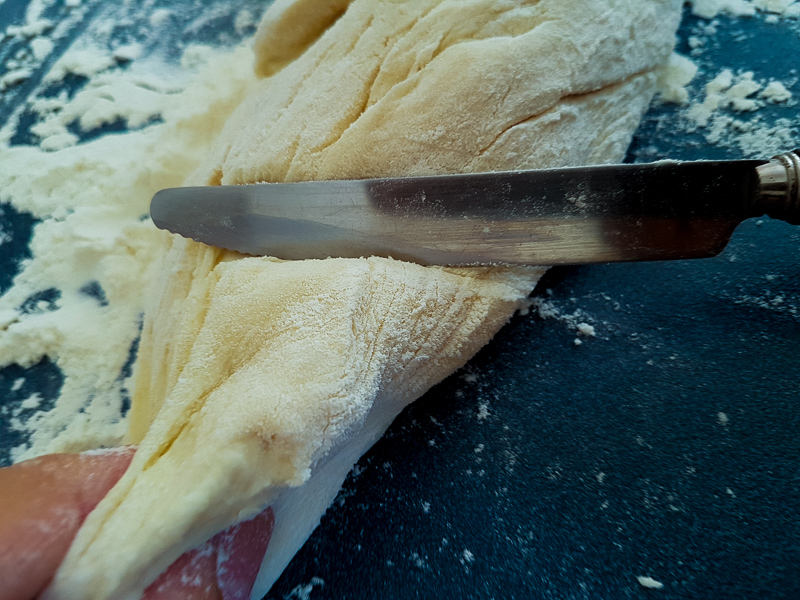
- This second rise should only take an hour and a bit. The dough should have doubled in size again but with only a few holes this time. On your clean counter top, dump another half cup of fresh flour because you're going to knead the dough again, but only to get rid of a little more sticky-ness.
- And now it's time to roll your buns. That means, cut a palm-full of dough, roll it between your hands into a short, thick rope thing, then tie it like an 'almost' knot. If that's too hard, you can always just roll a sphere - up to you.
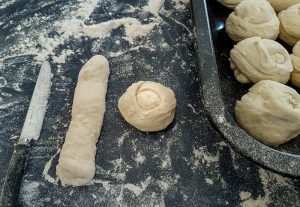
- Oh wait!! Now is the perfect time to pre-heat your oven - 200 degrees Celsius if you're in NZ... or whatever that is in Fahrenheit (400?). Okay, continue.
- Place your buns in neat rows in a pan that can take up to 24 buns (sorry, I'm still not sure what size pan that is). Let them sit there for a while (they will continue to rise) as you go prepare the coconut cream sauce.
The Coconut Cream Sauce
- Pour one can (or 450ml) of coconut cream into a container. Chuck 2 tablespoons of plain flour into the empty can (or a cup) and slowly pour warm water into it - stirring, stirring, stirring - until the flour dissolves.
- When the can/cup is full of water, pour the mixture into the coconut cream. Add one more can/cup of warm water - still stirring - and then stir in a cup of sugar.
The Final Step
- Wow. This recipe is easy, but really time consuming, a ea? But we're finally at the end - yay!
- You just need to pour your coconut cream sauce into the pan with the buns (save maybe a cup of cream to add halfway through the bake) then put the pan in the oven and go put your feet up for 20 minutes.
- Come back after 20 minutes to check that your buns haven't burnt and the sauce hasn't spilled over and the oven is heating everything up evenly, etc. The sauce should have cooked down a little bit, so now's a good time to add the last bit of coconut cream, then close the oven for another little while.
- After around another 20-25 mins (roughly 45 minutes in total), your buns should be golden on top with coconut cream bubbling around the bottom. Take the pan out and cover it with tin foil so the buns don't dry out as they cool.
- Done! Call the family over, make a cuppa something nice, and share the panipopo love.
I think it’s pretty clear now why authentic, Samoan panipopo – especially this recipe – is food for MY soul. It’s all about family.
It makes me think of the grandfather I only know from stories and photos… a carpenter who built houses and cathedrals, a businessman who ran plantations and stores and inspired a Samoan newspaper… a caring babysitter who nurtured me as an infant when my parents had to work.
I smile thinking about my aunt – so proud of her baking skills, so generous with her knowledge… that apparently came from my cousin? I love that I’ve joined the family pagipopo tradition, but it comes with a challenge: who’s hand is really the best at making this treat?
Pagipopo reminds me of Christmas and New Years, birthdays and funerals, when the family is together and it’s time for Cup Tea.
I hope this recipe becomes a staple for your family, too.
Quick Samoan Language Tips:
Pani = bun, which isn’t quite the same as bread (or dinner roll), which is why this recipe does not include milk or eggs. Instead, this makes the same dough that’s similar (but not exactly the same) to the kind used for Samoan pork buns or German buns.
Popo = coconut, specifically mature coconuts with thick meat that’s grated and squeezed to produce gorgeous coconut cream.
Panipopo is the correct name for this dish, but in casual-talk, Samoans will also pronounce it pagipopo – where the ‘g’ sounds like the ‘ng’ in ‘hanger’.
The plural of panipopo is also panipopo.
—-
Tried this recipe? Please tell us about it in the comments below.
Ohh, and if you make this recipe and post a photo up on social, please use the hashtag #manauiPanipopo so we can check it out, too. 🙂

Panipopo, Samoan Soul Food
My husband I have tried your recipe out 3 times in the space of 2 to 3 weeks and loved each attempt, although trying something a little bit different with each attempt.
Our 4th try out will be either today or tomorrow so Ill be sure to keep clicking.
Thanks so much for sharing your Aunts recipe. We reside as far as Papua New Guinea, hoping to perfect and share with our wonderful Samoan, Fijian, Tongan, Australian, PNG friends here, but especially those who will chomp into it with the splendid instant silent thrill and desire…asking, is this the one from home?
Yesss. It must be perfected to bring “the taste of home” to us seafarers!!!
I’m Tongan by the way but as far as Im concerned, we are one people, happiest if one can embrace and love across borders and beliefs. God bless you all.
Hi Michelle
It’s so fun for me to know that people try this recipe and love it 🙂 Thank you for sharing your experience with it. (And now I feel like making some again lol).
I know panipopo is associated with Samoans, but I’m sure all our Pacific cultures have some version of it – like bani lolo in Fiji? And I’m sure every version is delicious!
Bless your adventurous spirit, all the way in Papua New Guinea. I hope to one day join you in the world-wide seafaring!
🙂
Gonna try it out right now and I’ll either post pictures or come back and tell you how it turned out.. thank you
Hi Lils! Thank you for sharing your Aunties recipe with the palagi measurements 🙂 Im Maori and my husband is Samoan and I’ve learnt to cook many dishes over the years and panipopo was on my list to learn. These turned out so yummy 🙂 I’ll make a few tweaks to suit our dishes and oven but overall really happy. Even the man said oh hey I think that tastes better than all the panipopo I’ve had hahaha! Being fair skinned I am the token palagi in the family so it’s always a joke that my Samoan cooking is good. Thanks Lils!! From one maori geek to another 🙂 Elly x
Yess!! Finally an authentic recipe that doesn’t include dinner roles! Thank you for sharing your Aunt’s recipe! I’m so excited to try it out! Thank you soooo much! Alofa atu!
Fa’afetai lava for sharing…I’ve always buy a pan from a friend that makes this. I was in LA and watched my nephew got down with making Panipopo and it’s everything you’ve mentioned but triple the measurements, because 20 family members were coming over for a meeting! continue success and I’ll definitely post my adventure of Panipopo from San Diego, CA!! God Bless!
Alofa atu!
Sina!
I tried your recipe in the weekend and it is a winner!!! My family demolished the whole apa!!! I’ve tried other recipes but yours was the best!!! Thank you for sharing this recipe.
Your recipe was by far the best recipe I have seen online. Made it last night and it’s definitely a keeper. Thanks for sharing your recipe
Hi, I tasted it once and have been looking for the recipe since. I’m on pinterest and thought I’d check and to my amazement ❤️, found it. I’m so thrilled.. will be trying this recipe.. Will let you know how I go. Thanks for sharing . From PNG.
Thanks Lina and Theresa…and everybody else who’s tried this recipe so far. It’s definitely a favourite in our house 🙂
I followed your recipe and put 2 cups water in addition to the 1 cup that was too dissolve the yeast and my batter is watery not thick? Hoping it rises!
I hope it turned out okay. The two additional cups of water are what it usually takes to get my batter to a thick but ‘jiggly’ consistency – like a thick pancake batter. Anything more ‘watery’ than that and I’d be a little worried lol. I’m keen to know how your panipopo turned out.
Thank you so much for the recipe. I only did half the measurements even tho I didn’t follow exactly amount measurements I followed the texture as you descripe, they got out a while ago I’m trying it now I gotta say it is the Best I ever had. So yummy .
It’s funny…following the texture instructions are a lot more accurate to me than the measured ingredients, because so many differences in the condition of your kitchen or the weather etc. can affect how a recipe turns out. I think our old Samoan bakers – who never followed recipes – knew that well :).
Wow! I don’t follow measurements too I like how mine turns out pagipopo sa’o a lea
I have watched other videos and most of them uses eggs and oil but your recipe is top notch real Samoan panipopoglad I found you♥️
I am one of those Samoan bakers. I have all the tools and equipment of the modern times, but I prefer the old ways. I am in to “sourdough”. I want to tweak your aunty’s recipe using “sourdough starter” instead of yeast. I made some cinnamon rolls last week with sourdough starter and they turned out beautifully. The texture and taste of the rolls inspired me to try it with siamu popo.
Ooh using sourdough starter should be perfect, though. All we need is something to make the dough grow lol
Talofa Lils i will.make this this weekend. I discovered Pani Popo when i attended Pesega Primary in the early 80s and havent had them since. My family lived in Apia fir 3 years and i agree Samoan baked goods are just amazing. My parents would get up early on the weekends to buy cinnamon loaf and i also enjoyed german buns. Wonderful memories i am in London now so will be cheering my London pals up during another lockdown with your recipe.
Fa’fetai lava
Caroline
A warm cinnamon loaf in the morning sounds beautiful. Thank you for sharing food memories (my favorite kind of memories! ). How did your panipopo go?
Great recipe! For someone who barely bakes, this was super easy to follow. Thank you for posting!
I’m happy you enjoyed it
love this recipe! It’s the closest thing I can get to the ones I had growing up, all the other recipes on the web just don’t sit right with me lol. I reckon the key is in adding the flour to the sauce, that’s what my nana said anyway! I’m now the go-to for the family’s panipopo needs, even my palagi flatmates love them so much they want me to run a panipopo workshop for them since we’re in lockdown. manuia 🙂
I should include a disclaimer next time – once you get good at these, your family is not going to leave you alone lol.
As long as you’re okay with that
thanks for sharing your recipe 🙂 .. gave it a go today and it tasted like a fa’apapa LOL kinda solid in the inside? not sure what i did wrong dou ahaha
Lol.. Kalofa e. I’m sorry your batch didn’t come out as expected. This actually happened when my brother tried the recipe on his own. I had to coach him in person to get the paluga right. The issue might be a couple of things:
– Make sure to add enough water to the flour mixture. The measurement for water in this recipe is what works in my climate with the flour I use, but it may vary depending on your situation. The best way to know you’ve got the right consistency is to eyeball it. You want to mix in enough water so that your dough is like a very thick pancake batter that is just loose enough to jiggle when you shake the bowl.
– Make sure not to knead the dough too much after it’s risen the first time. The dough should be smooth but still pretty soft when you push on it. For me, it only takes a minute or 2 of kneading to get it there.
I hope that helps…don’t give up!
🙂
Oops I think I’ve kneaded my dough a bit much after the first rise. My dough was still lumpy so I kept going to try and get it a bit smoother like a bread dough, but realised right at the end that might make the gluten in the dough too firm for this type of baking. I’ll let you know how they turn out after baking – I hope they’re ok!
thanks Lils, back to the drawing board for me haha have a good weekend
oh i think ive found the problem, i used a mixed active yeast that’s ideal for bread only, so its quite strong compare to the normal one hahaha
I hope you solved the mystery! lol
Let us know if you try again 🙂
I have tried it 4 times and still getting the same result LOL still very hard in the inside like a faapapa hehe I wonder if its something to do with the ingredients or my measurements.
Also, re step 4 and 5 – I dont see any holes in mines after one hour hahah dont know why dou. are you using plain flour or self raising flour? Also is one cup, are you using a ipu ki or the palagis measurement? thanks so much
I have tried it 4 times and still getting the same result LOL still very hard in the inside like a faapapa hehe I wonder if its something to do with the ingredients or my measurements.
Also, re step 4 and 5 – I dont see any holes in mine after two hours hahah dont know why dou. are you using plain flour or self raising flour?
Oka Mose (or Jay?). Time to troubleshoot your panipopo…lol.
So I’ve worked this recipe out in palagi measurements, which means… A cup is a palagi measuring cup, not a ipu ki . And 1 cup is 120 grams of flour, in case you wanna weigh it instead.
The only reason I can think that you’re not seeing holes in the dough (which sounds like the dough is not rising) is that some thing is wrong with the yeast.
To confirm, we use all purpose (not self-raising) flour in this recipe. But you might want to check the yeast before it goes in the dough.
Add the yeast to a bowl (metal or ceramic bowl, not plastic). Put warm water and sugar in the same bowl and stir till dissolved…then wait to see if the mixture foams up and gets a bit bubbly.
If it does, then the yeast is good – you can go ahead and use it in the dough. If not, maybe buy new yeast? Make sure it’s active dry yeast.
The other thing you want to make sure of is that you’re not kneading the dough too much. The more you knead, the firmer the bread will be – but this one is not supposed to be firm. This one, you just want to knead until combined, but still smoothe and soft to the touch.
I hope one of these tips helps. Please let us know how you go.
I’ll be praying for you
Thanks so much Lils, im doing it again tonight so I def need all the prayers I can get LOL
Oh, also… Make sure the water that you add to the yeast is warm but not too hot. If it’s not warm enough, the yeast won’t react. If it’s too hot, the yeast will die (yes, I know…it’s complicated lol).
And… If after an hour the dough hasn’t doubled in size (and you don’t see bubbles on top), it’s okay to leave it for another half hour or even another hour… But honestly, if the yeast is good, you should already see a difference after an hour.
I actually have video footage of us making panipopo. I think you’re inspiring me to make the video already :D.
Good luck!
Thank you, I have been using boiling water LOL so its def not just warm but VERY VERY warm LOL
Lol… I knew it!
How did your last try go?
Love love love your recipe! My husband & his fams are Samoan & I’m the palangi wife
I’ve made this 3 times now and never think it’s gonna come out right but it’s always the best! I have some in the oven right now for the big family Christmas Eve gathering so praying it will turn out just right! I always only end up using 2 extra cups of water when making the dough and I live in Sunny Qld & that seems to work well for me.
My father in law says it’s just right but my husband always asks for it to be even sweeter.
Bless you & thank you for giving me something that helps me share in Samoan culture! ♥️
When I first came to NZ, one of my oldest friends, invited me to his house to play.
His Mum had just baked a tray of these heavenly delights.
I had a funny accent and Palangi but, oh my stars, this was YES!!!
Thank you for sharing, finally, I can make some for my kids.
And yes we arrived on a boat.
🙂
Thank you so much for sharing ghis the best Panipopo I had baked so far Tongan home baker living in France came across your blog today and had to baked it. Malo
You are very welcome. I’m happy you enjoyed some island food all the way in France :).
I followed your recipe and it was
It was FIRE!! Thank you
Yayy!
This was absolutely delicious. We are trying to cook lots of Samoan dishes at home (our daughter is part Samoan and we are not and her birth mom was raised outside her culture as well). Recipes like this along with sharing the back story help so much as we try our best to patch together some of what they have lost. Thank you
I’m excited to hear this – yay! So happy you tried it.
Lils are you still out there. Gave made this recipe heaps over the years and also passed on to my grandaughter.
I’m wanting some for early morning and don’t want to get up at about 4am to start from scratch and then wait through rising periods. Can I do some the night before and leave it overnight at any stage?
Lol yes I wouldn’t want to wake up at 4am, not even for pagipopo (usually..) What I’ve done in the past is let the dough rise overnight in the fridge. The cold slows down the rising so it doesn’t get too crazy by morning. I think it’s better to let it rise in the fridge AFTER you’ve incorporated the batter with extra flour into a dough, so for the second rise.
But these buns also keep well in the fridge after they’re baked, and they warm up beautifully in the microwave (maybe 15-20 seconds per bun with coconut cream sauce, depending on how strong your microwave is).
Can I use cornstarch instead of flour in the coconut cream sauce. I cannot wait to try making this, also can I adapt the recipe?
You can do whatever you want with the recipe lol.. but I think cornstarch would work great. For me (in other dishes) I usually need to use a lot more cornstarch than flour to get the consistency I want, but cornstarch does seem to make sauces ‘silky’er lol. Let us know how it turns out 🙂