If you’re curious about what is ‘ika mata’ and what it taste like… then why not try out this simple, quick and easy recipe.
But first let me tell you a bit about ‘ika mata’.
What is ‘ika mata’ and where does it come from?
‘Ika mata’ means ‘Raw fish’ in Rarotongan Maori.
The traditional way that we’d normally have raw fish is using the Maroro fish (flying fish). We’d slice the fish into 2 and half inch pieces, then make 2 or 3 slices back and front leaving the skin on, then marinate it in lemon/lime juice and salt.
You can use any type of fish but our most favorite is the Maroro or yellow fin ‘Tuna’.
‘Ika mata’ comes not only from the Cook Islands but from all around the Pacific Islands e.g Samoa, Tonga, Niue, Fiji, Tahiti, Tuvalu etc. and we all tend to make raw fish our very own.
Although we have our own preferences, this is definitely a versatile dish – you can add any ingredients you like.
Ika mata is definitely a dish to try out when you fly over to the Cook Islands and it is best accompanied with Taro, Maniota( Casava) or Tunu Meika (cooked green banana)
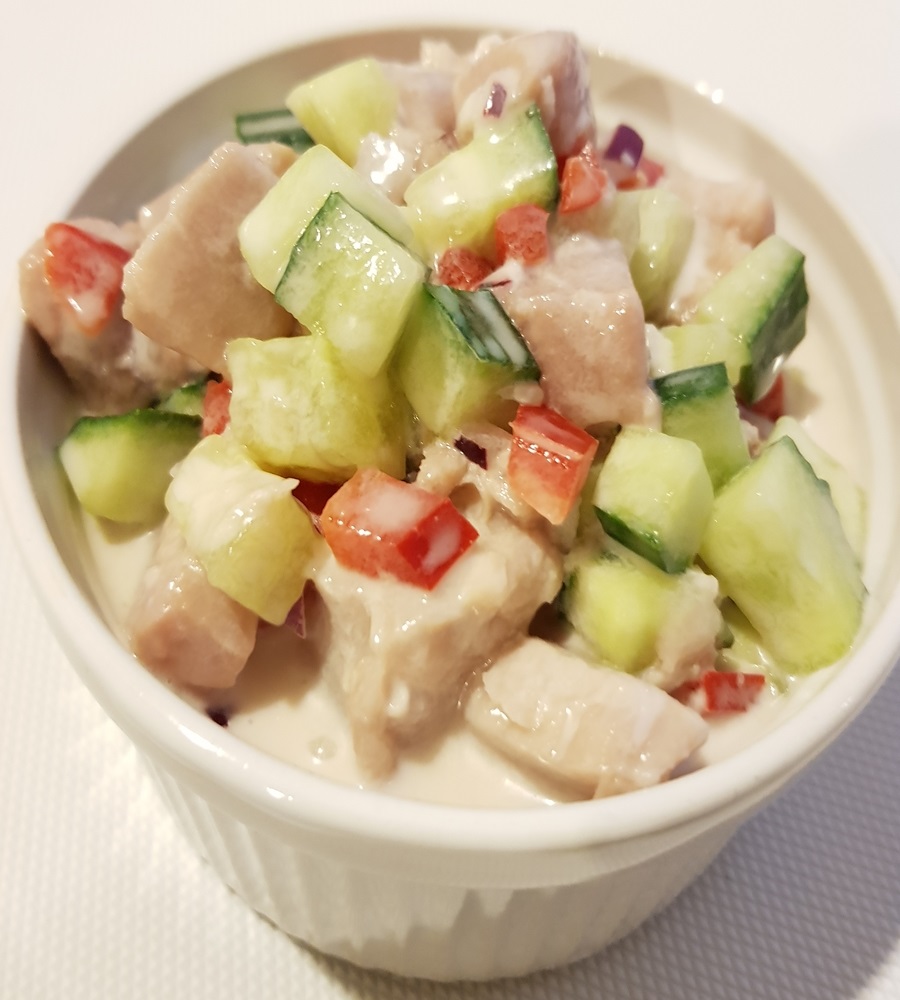
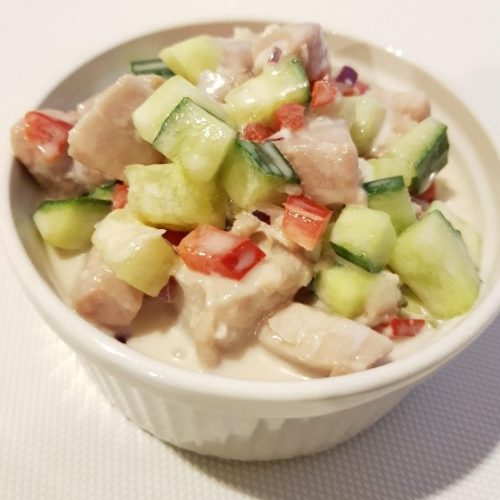
The type of ‘ika mata’ I’ll be sharing today is using tuna, coconut cream and a few vegetables.
This is one of my favorite dishes, one I crave whenever I fly back home, so please do give it a try and don’t be afraid to add whatever you like to this dish.
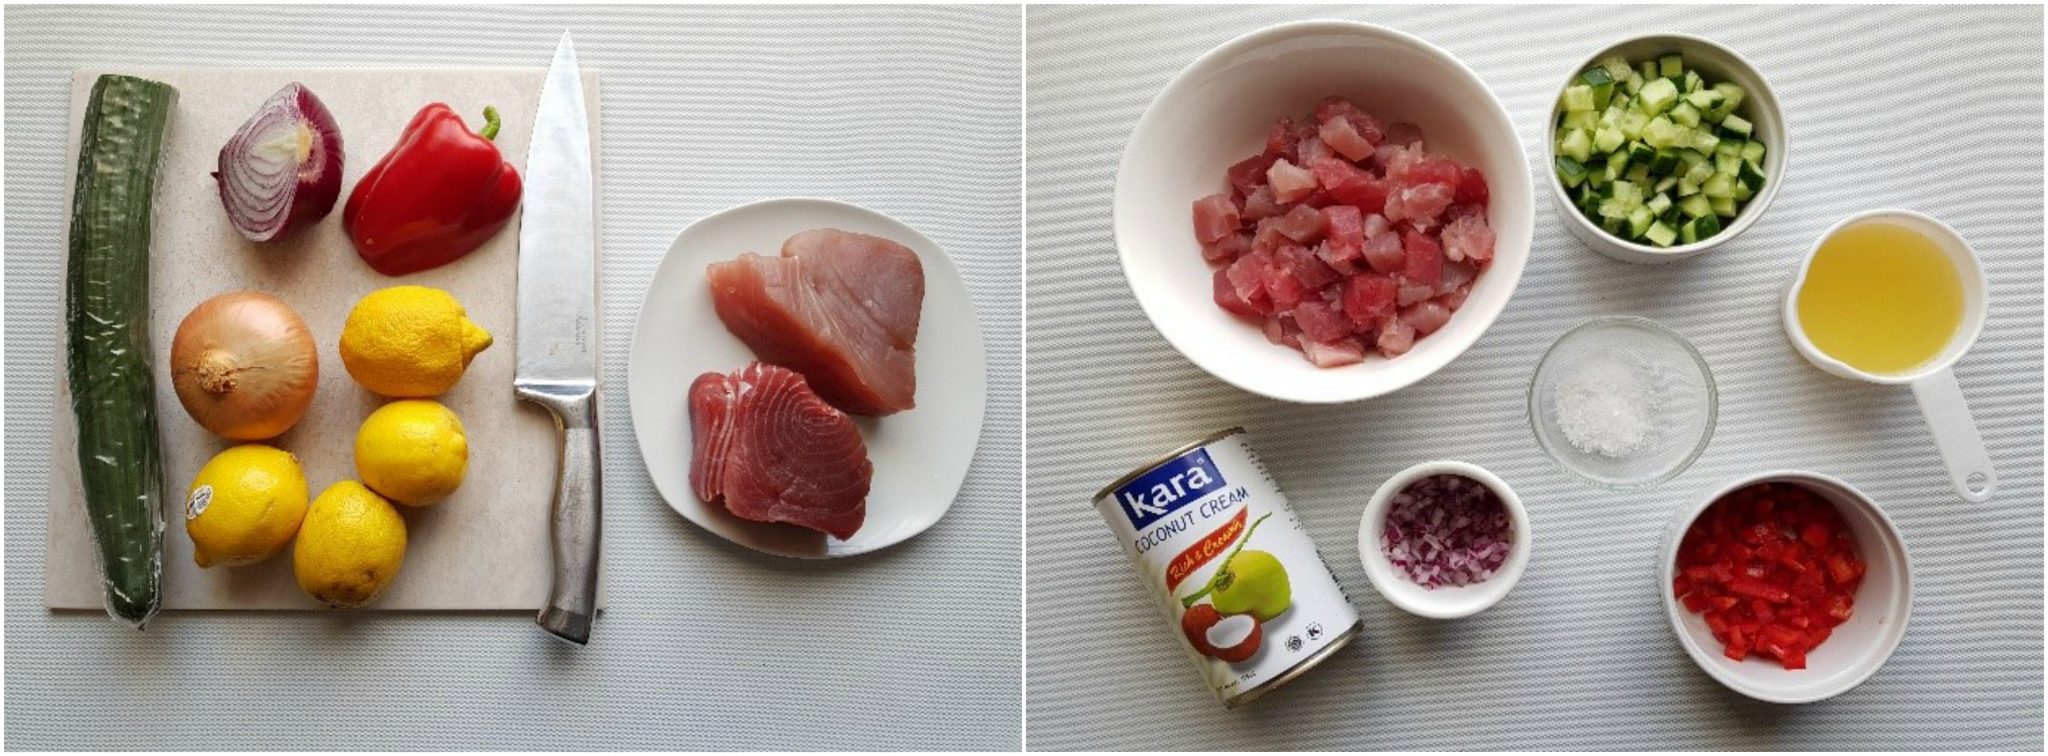
(These ingredients are what I had in my fridge at the time, so it’s very basic and simple, but delicious.)
Cook Island Style Ika Mata (Raw Fish)
Marie Unuka
Every Pacific Island has its version of raw fish. Cook Islanders call it 'ika mata, and this beautifully simple, delicious recipe can be thrown together with ingredients you probably already have in your fridge.
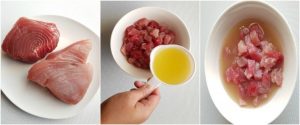
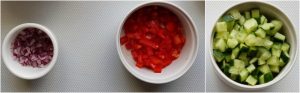
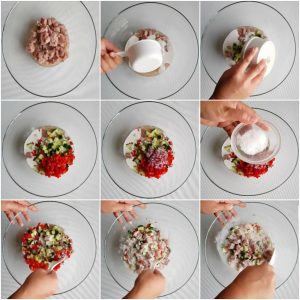
Wash and dice the tuna into bite size pieces. Add to a clean bowl.Add the juice of 4 lemons to the bowl of tuna, cover and let it chill in the fridge for 30-45mins.
Dice the cucumber, capsicum and onions. Cover and let them chill in the fridge until the tuna has finished marinating.
In a new bowl, add the marinated tuna and lemon juice along with 1/2 cup of coconut cream and mix. Add all the diced cucumber, capsicum and onions to the bowl and mix well. Add 1 tsp of salt to taste.
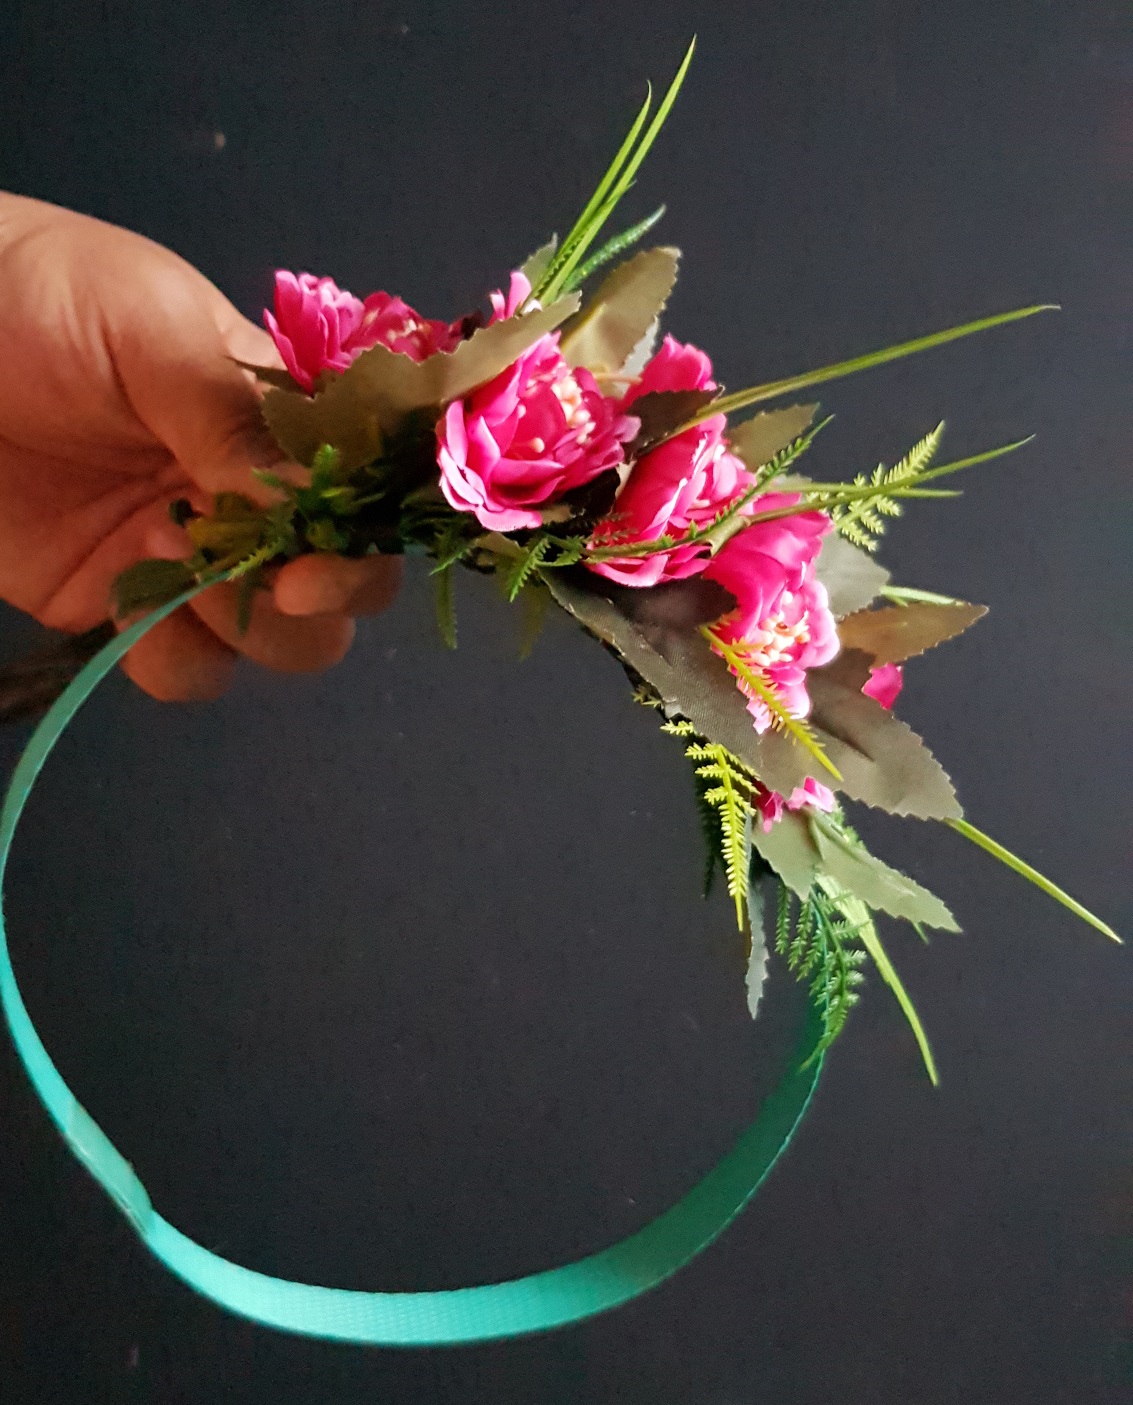
Have you ever wanted to learn how to make a Cook Island ‘ei katu? (That’s a flower crown/wreath or head garland in English.)
You’ve come to the right place!
Back in Rarotonga we usually have easy access to a wide range of tropical fresh flowers and leaves, but having resided in New Zealand for the past few years it’s not as easy as it used to be.
As an alternative, we showcase our craft skills using synthetic flowers and leaves. Even though it may not be authentic, it still represents who we are and where we come from.
So… since we don’t have access to fresh flowers and leaves, this will be a DIY tutorial on how to make a Cook Island ‘ei katu using synthetic flowers and leaves.
But first…
What is an ‘ei katu?
An ‘ei katu is a garland of flowers you wear on/around your head, also known as flower crown or head garland.
The word ‘ei in Cook Island Maori is something that you create to be worn around your head, neck or hips using shells, flowers or leaves.
‘Katu’ in Cook Island Maori means head, skull or scalp.
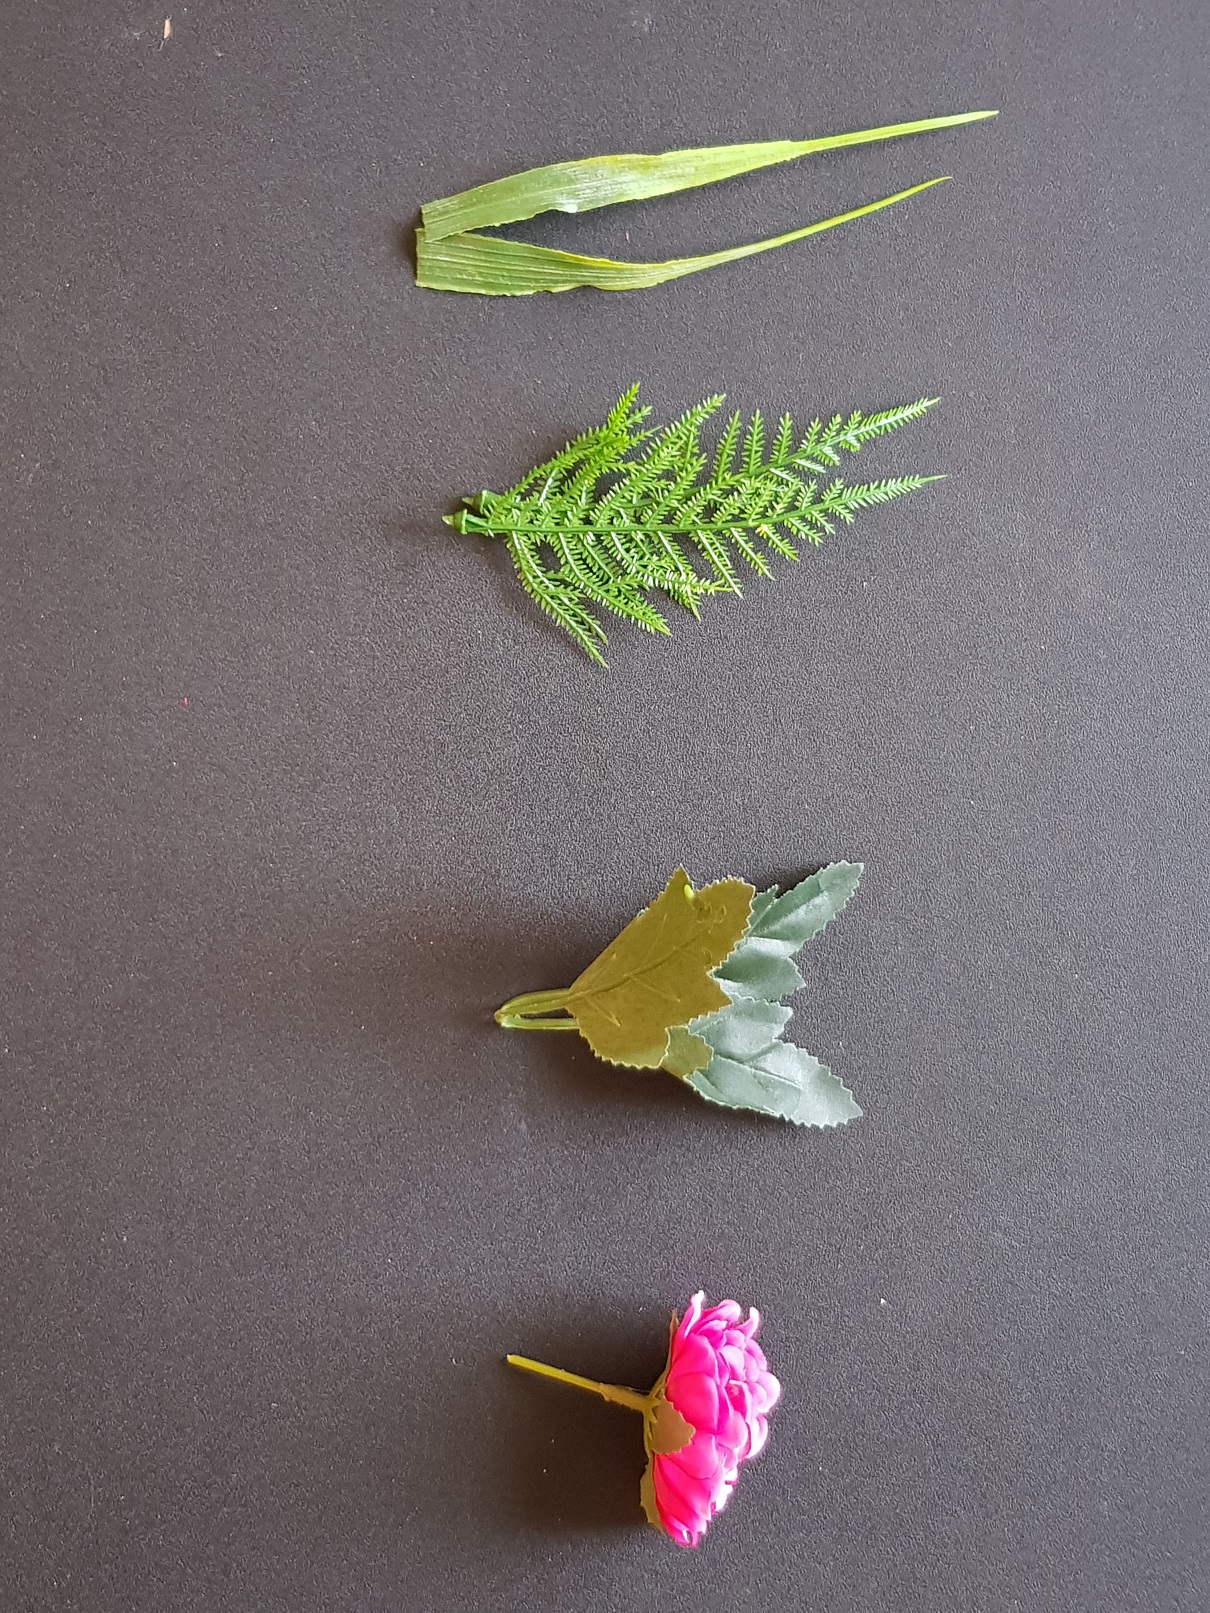
What type of flowers do we use to make ‘ei with?
We use all sorts of flowers or leaves when they’re in season. These are some of the flowers I love to use and also you’ll see them on most occasions.
Flowers:
Tiare Maori(Gardenia Taitensis) This is our National flower in the Cook Islands
Tiare Taina(Gardenia)
Tipani(Frangipani)
Bokenvilia(Bougainvillea)
Kaute(Hibiscus)
Yellow Bell
Leaves:
Rauti (Ti leaves- Green or Red)
Miri flower (Ocimum,Mentha)
Ariki Meika (Banana leaves)
The beauty of wearing these garlands is, not only does it make you look beautiful but it also makes you smell nice.
There are also different types of leaves we use to compliment certain flowers but it is at your own preference.
What is the purpose of an ‘ei katu?
An ‘ei katu represents our culture, who we are and where we come from.
We use a combination of local flowers and leaves in the ‘ei to adorn ourselves and enhance our beauty. Each flower and leaf also has its own unique smell/scent which I love.
Another purpose or should I say tradition still being practiced today by our mamas is that they showcase their talents by making ‘ei from their garden or backyard.
An ‘ei katu can be worn for celebrations, e.g weddings, birthdays, and ceremonies like hair-cuttings.
You can also wear them to work in the Cook Islands, unless they have strict rules at your job. Most of the time it’s not an issue.
Who can wear these ‘ei katu?
Women and men can wear them equally but the difference is that women would have more flowers in their head ‘ei than men. Also men would wear ‘ei katu more with leaves – like Rauti leaves or Maire leaves – either around their head or around their neck, especially for ceremonies.
How did I become interested in arts and crafts?
I have a lot of interests, ranging from music, to our Cook Island dishes, to arts and crafts.
But firstly, let me tell you a bit about my background.
I am a Rarotongan/Tahitian/Chinese. I was born and raised in Rarotonga by my parents and grandparents and I attended Arorangi school with my siblings and cousins.
One of the many things I loved about growing up in Rarotonga was going to school and learning about our culture at a very young age. I’m so glad I got to experience that.
We were taught how to dance, sing and play instruments, and we learned some Cook Island Maori words and how to make our own costumes. That’s how I came across my passion for being creative and expressing myself through arts and crafts.
I love to share what I’ve learned with anyone who is interested in our culture.
How to make ‘ei katu
In making ‘ei katu, it’s much easier to work with fresh flowers and leaves. Obviously when you’re back in the Cook Islands you are surrounded by a range of them, so you can be more creative with your crafting.
With synthetic flowers and leaves, your choice of flowers is limited, and they feel more stiff when you’re wrapping your rafia around each set.
You’ll still get the same results just without the scent of the flowers and leaves.
Anyway without further or do, these are the steps.
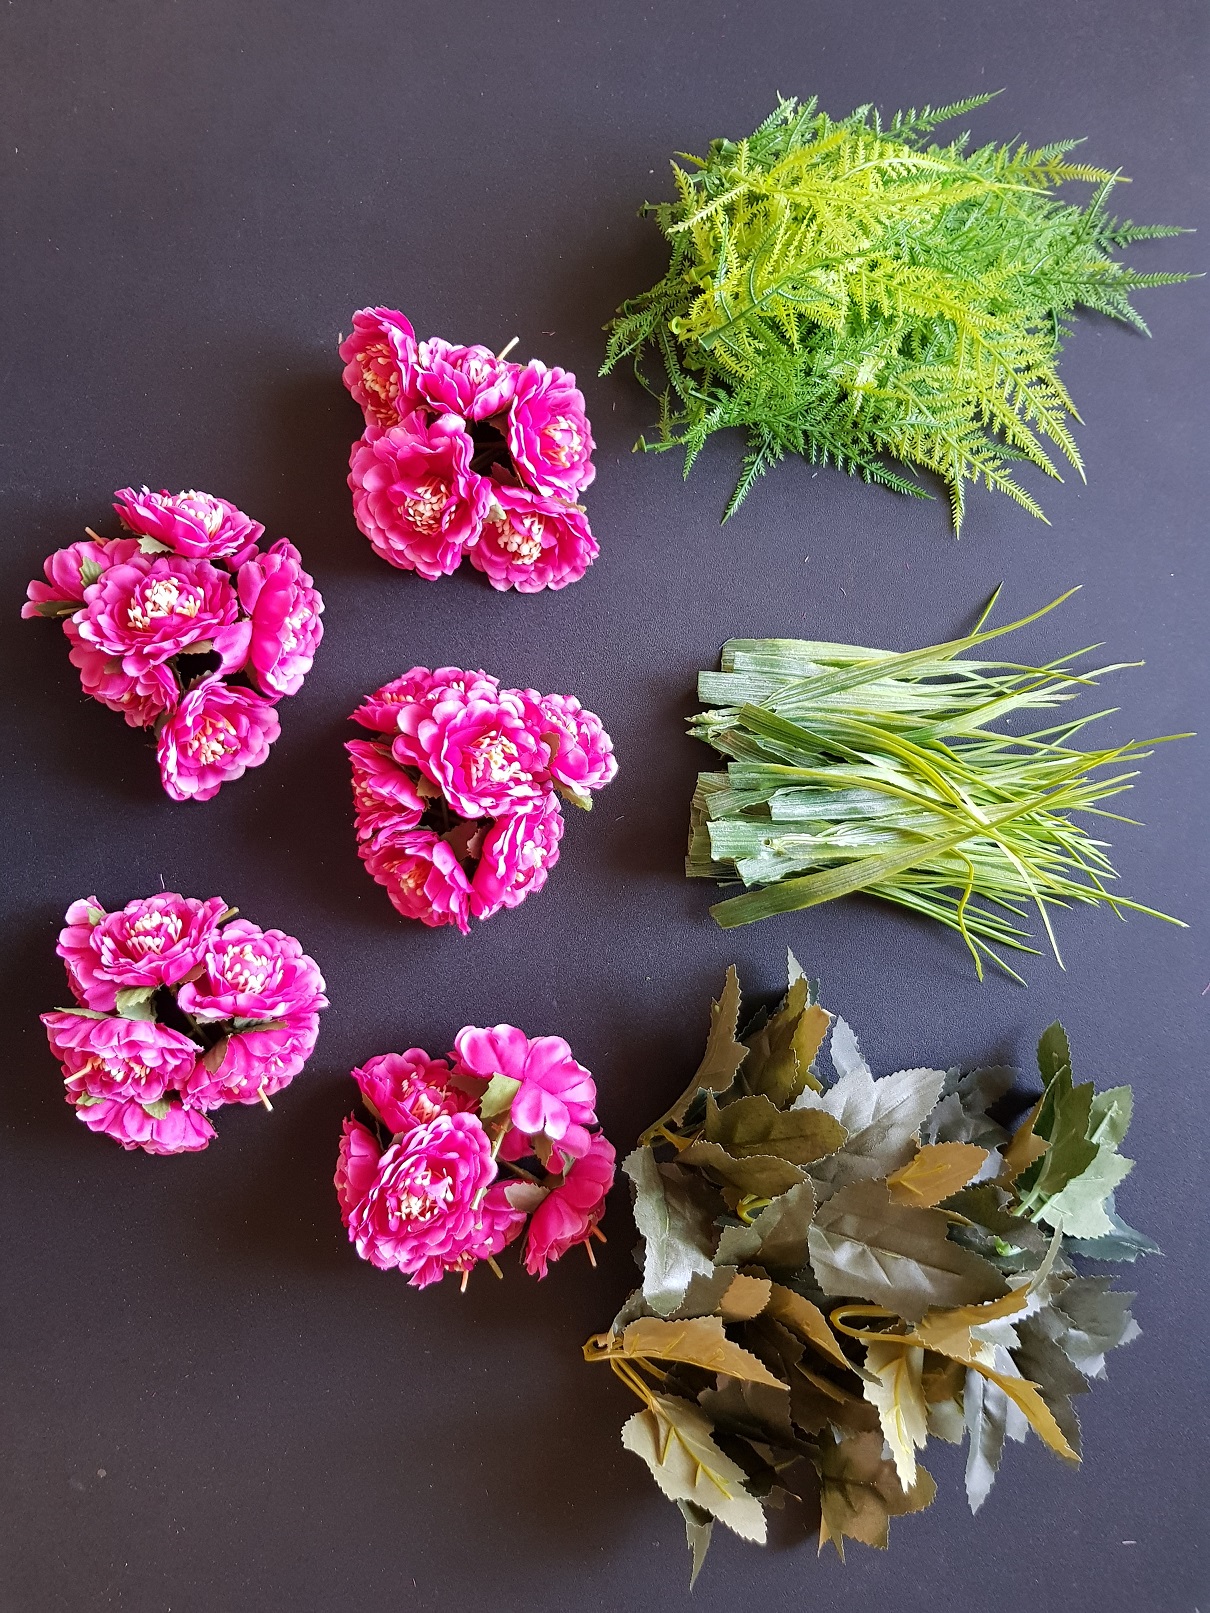
What you will need:
Synthetic flowers and leaves of your choice
Polypropylene Strap
Raffia
Scissors
Pliers
Sticky tape
Prep time: 5mins
Handling time: 20-30mins
(The first step is the most important part of creating your own ‘ei katu (flower crown). This also speeds up your handling time)
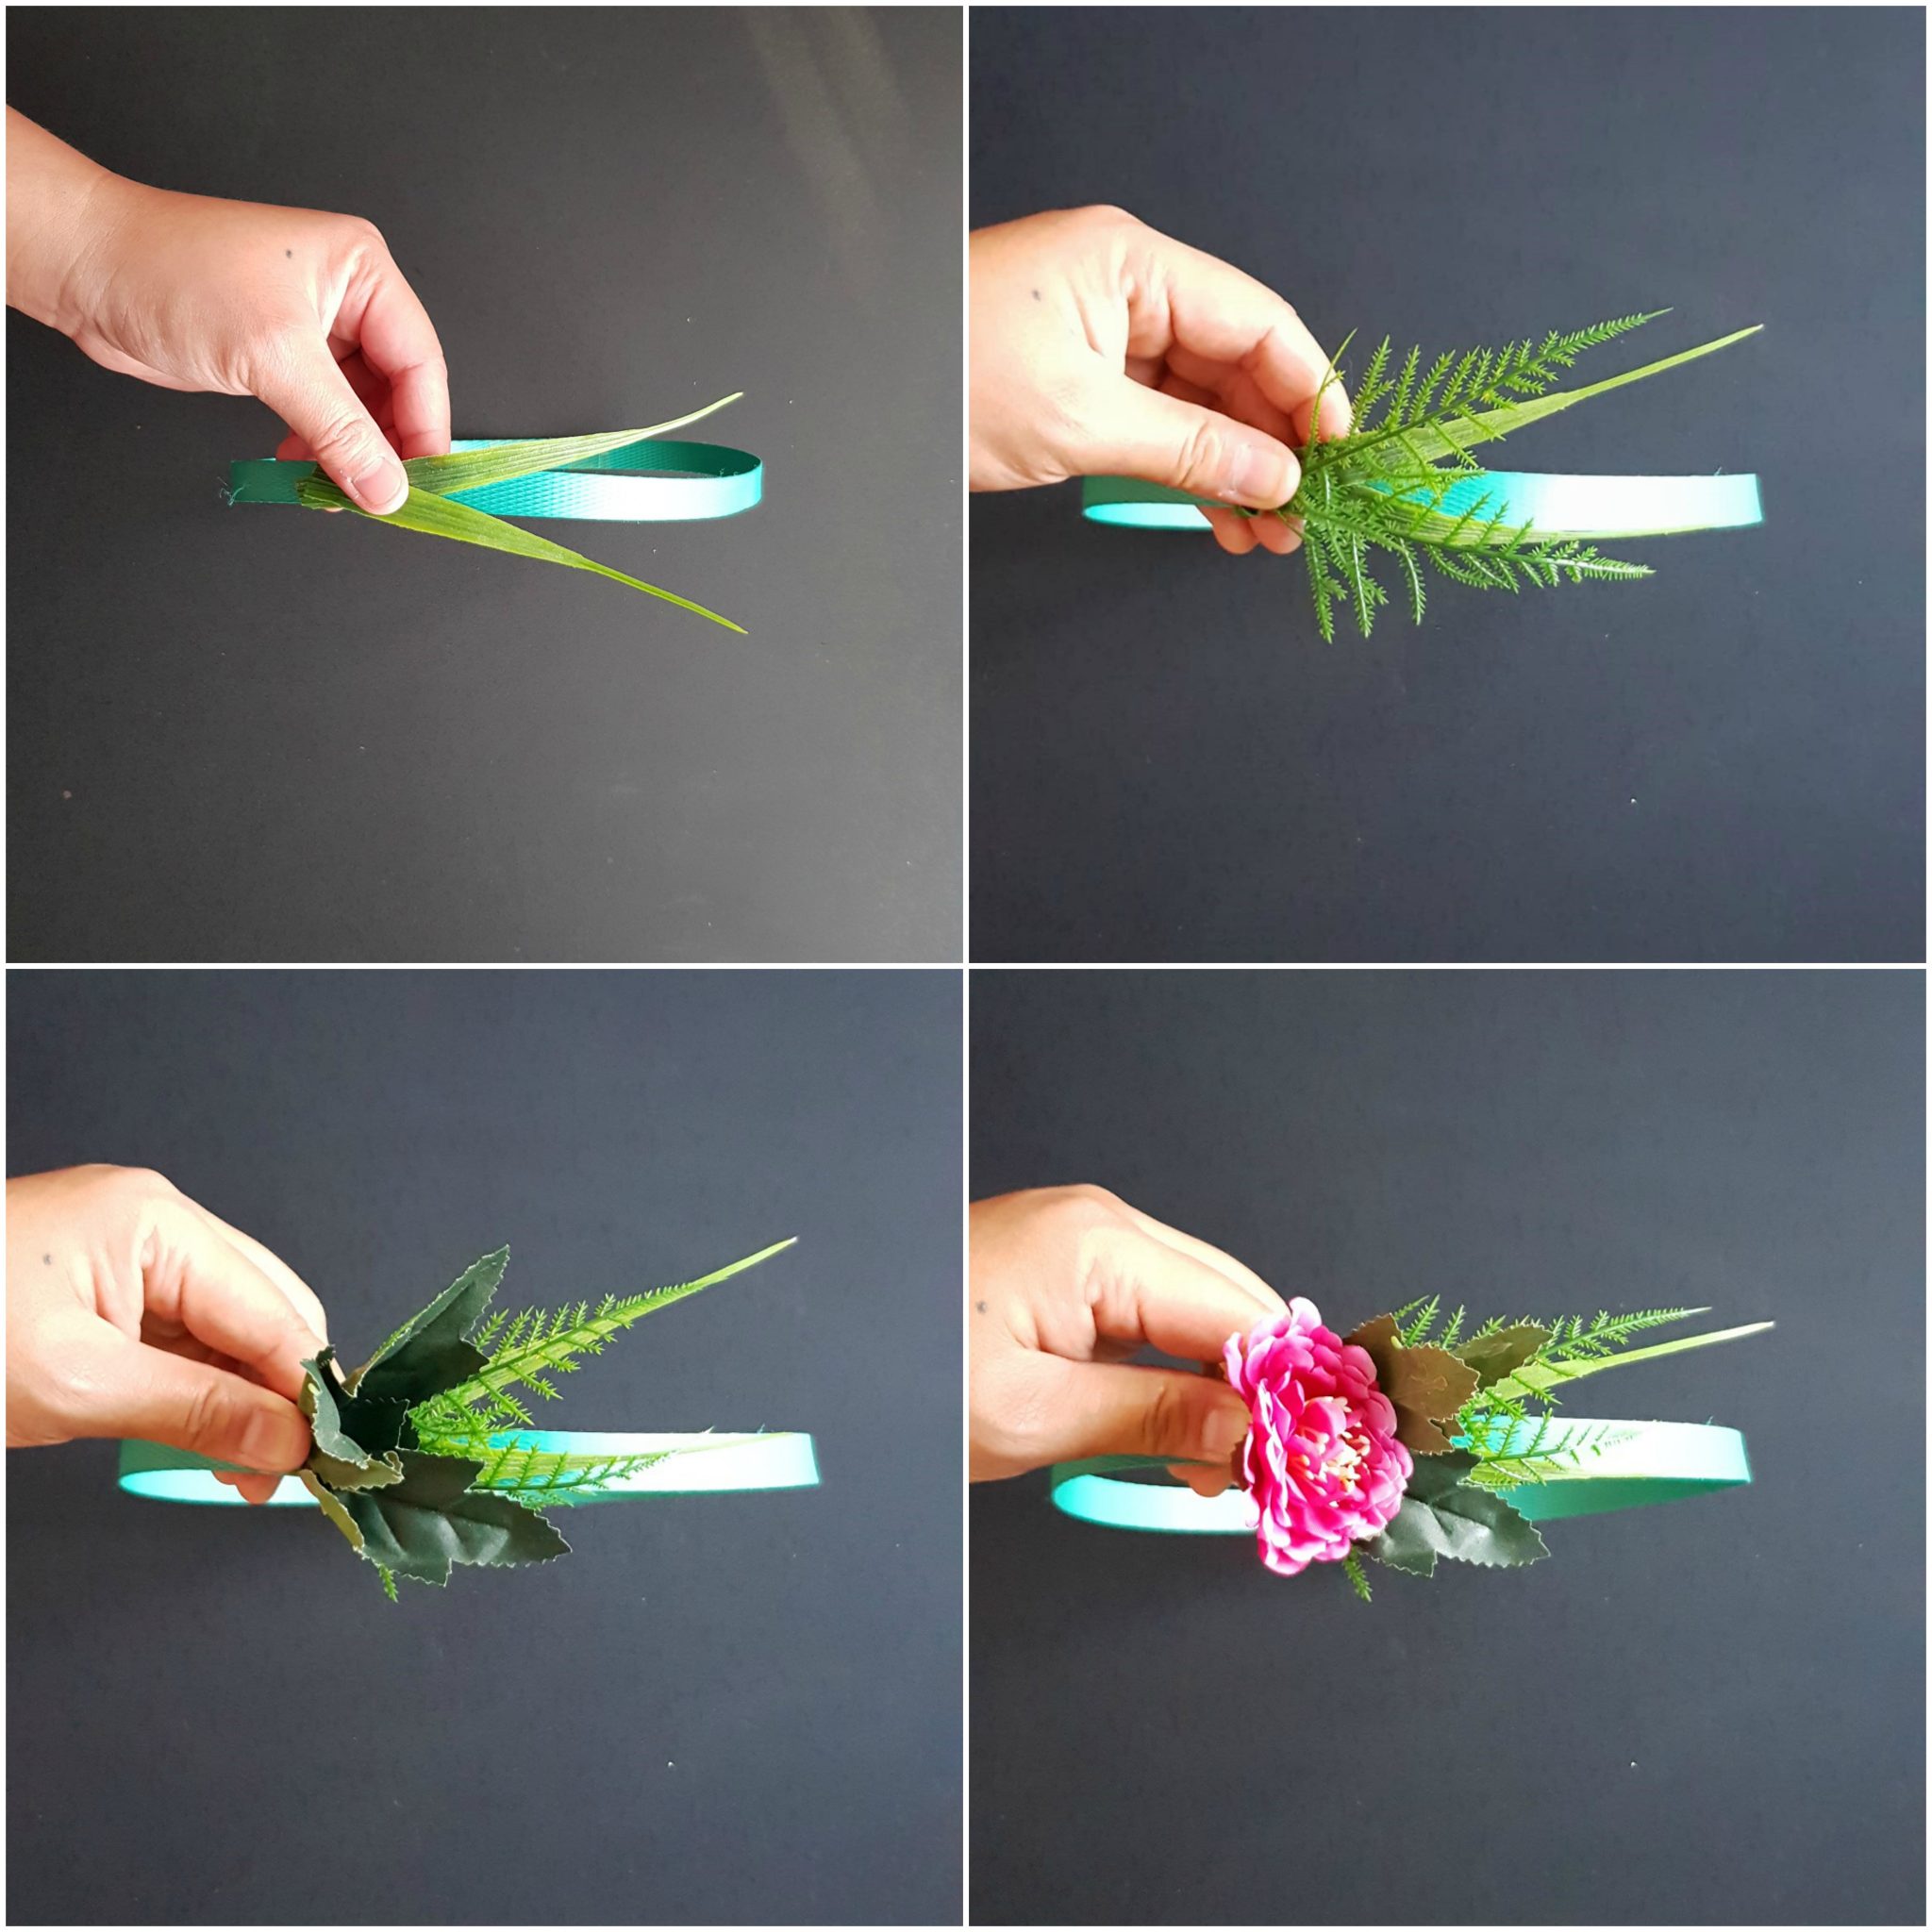
Step 1
Carefully clip each stem 3cm’s away from each flower and set that aside.
Separate the leaves by simply pulling them off the stems and set them aside. The narrow leaves you can measure and cut them at 7cm in length.
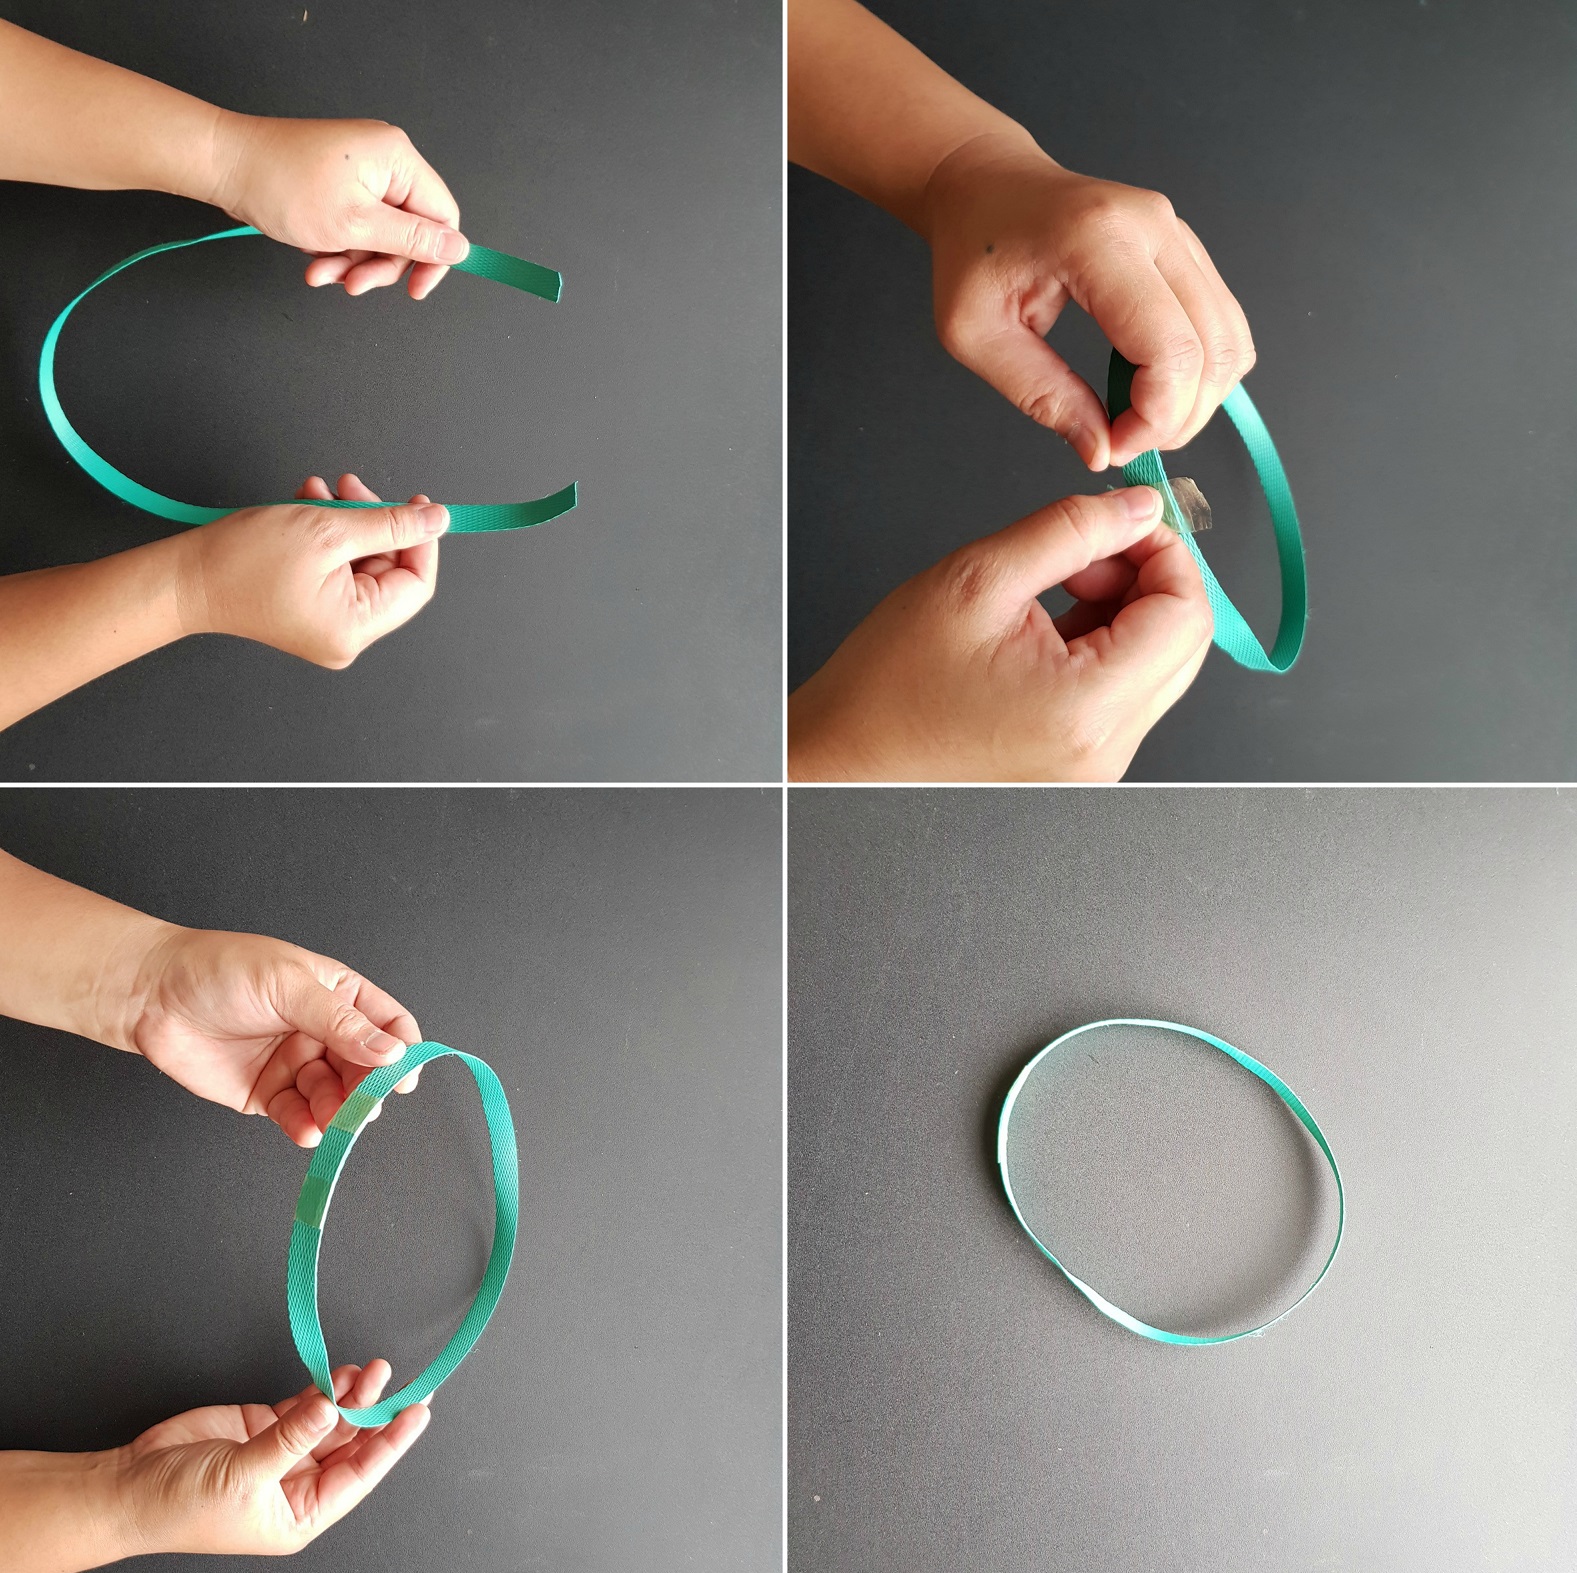
Step 2
Take your poly strap and measure it around your head. Use a sticky tape to hold the strap together like so and you’re ready to go.
Step 3
Measure about 1 and a 1/2 meters of raffia so that it’ll be easy to work with when you’re wrapping your raffia around each flower/leaf.
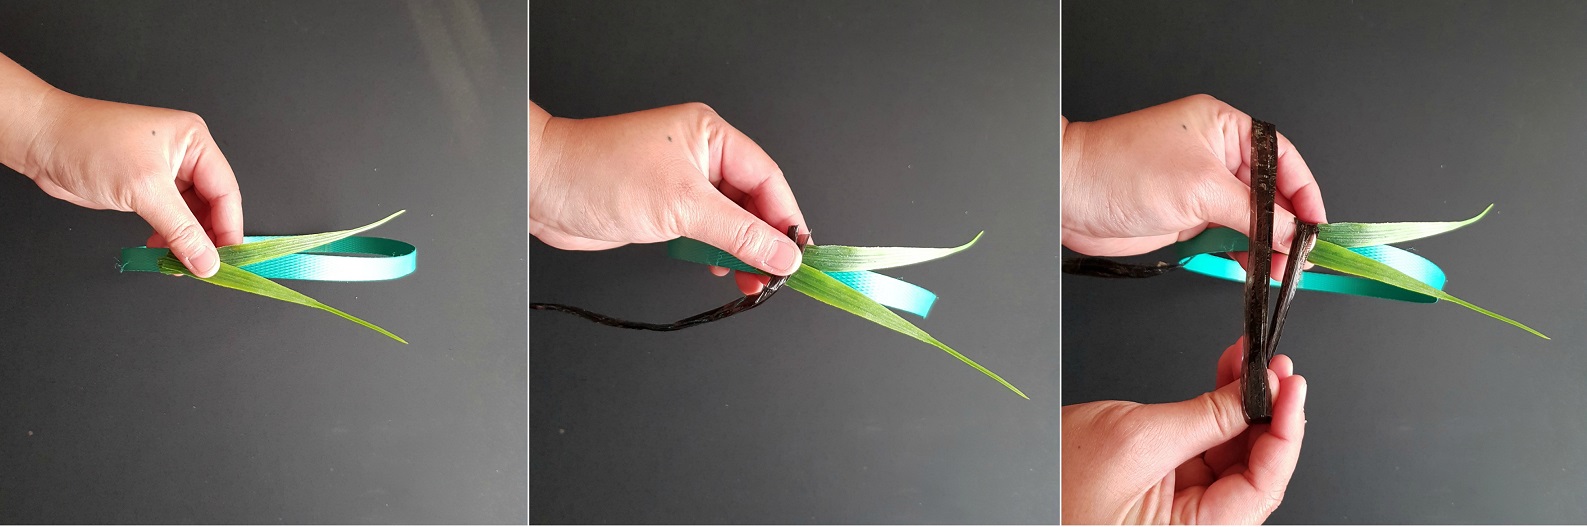
Step 4
I take 2 of the long leaves and position one by one onto the poly strap. One leaf will be pointing to the left and one pointing to the right. Pinch the 2 leaves and hold firmly so it doesn’t become loose.
Firmly wrap the raffia around the leaves and poly strap 2x and make sure you still have a good grip, holding the leaves and raffia in place.
This is my pattern/set starting from left to right.
(You can create your own preference)
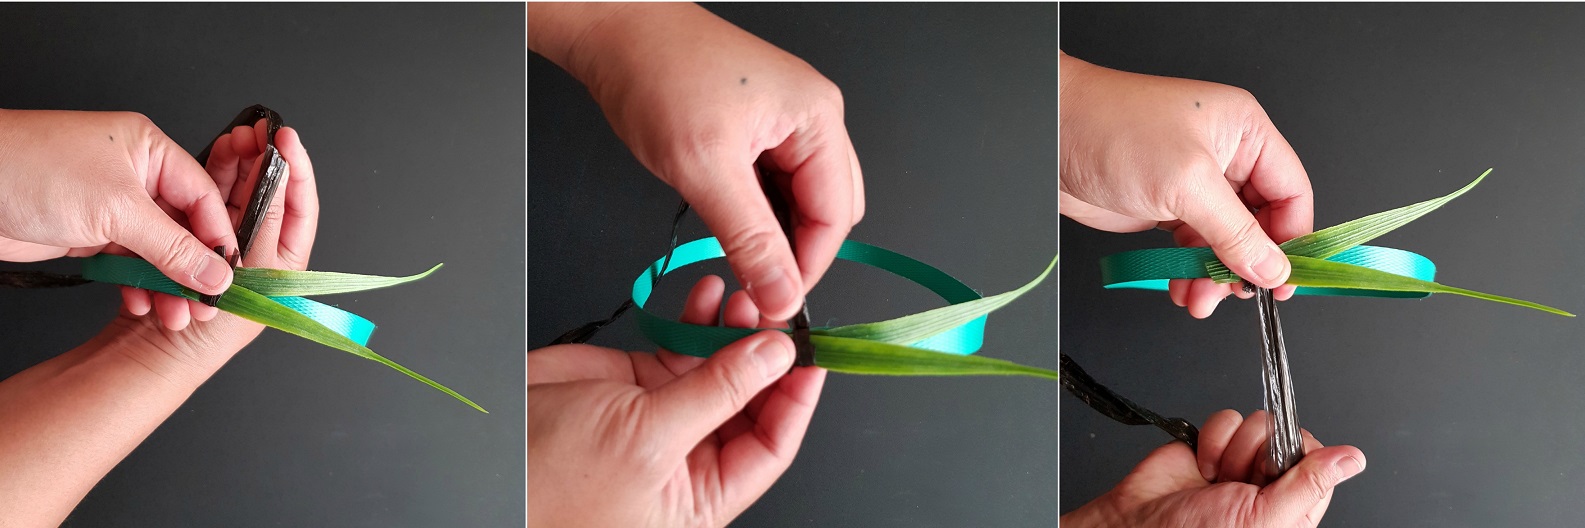
Step 5
After adding the first leaves and wrapping raffia around 2x, add the second set of leaves and repeat exactly with the third leaves and last but not least the flower.
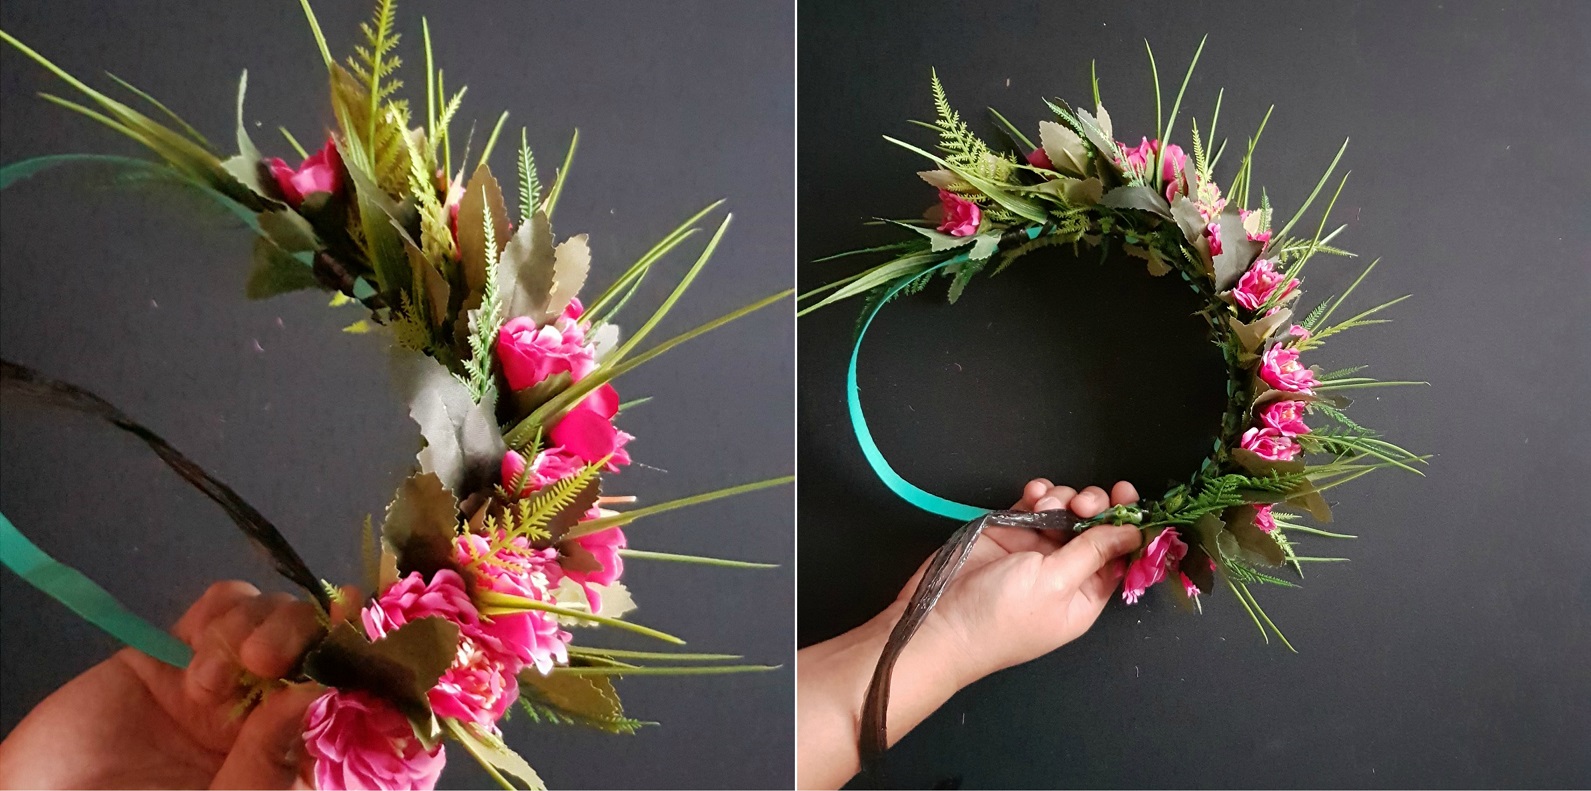
Step 6
You’ve finished your ‘ei katu when you can no longer add anymore leaves or flowers. The easiest way to complete it is by wrapping the raffia in between each existing flower and leaf and then making a knot just to make sure it’s secure enough.
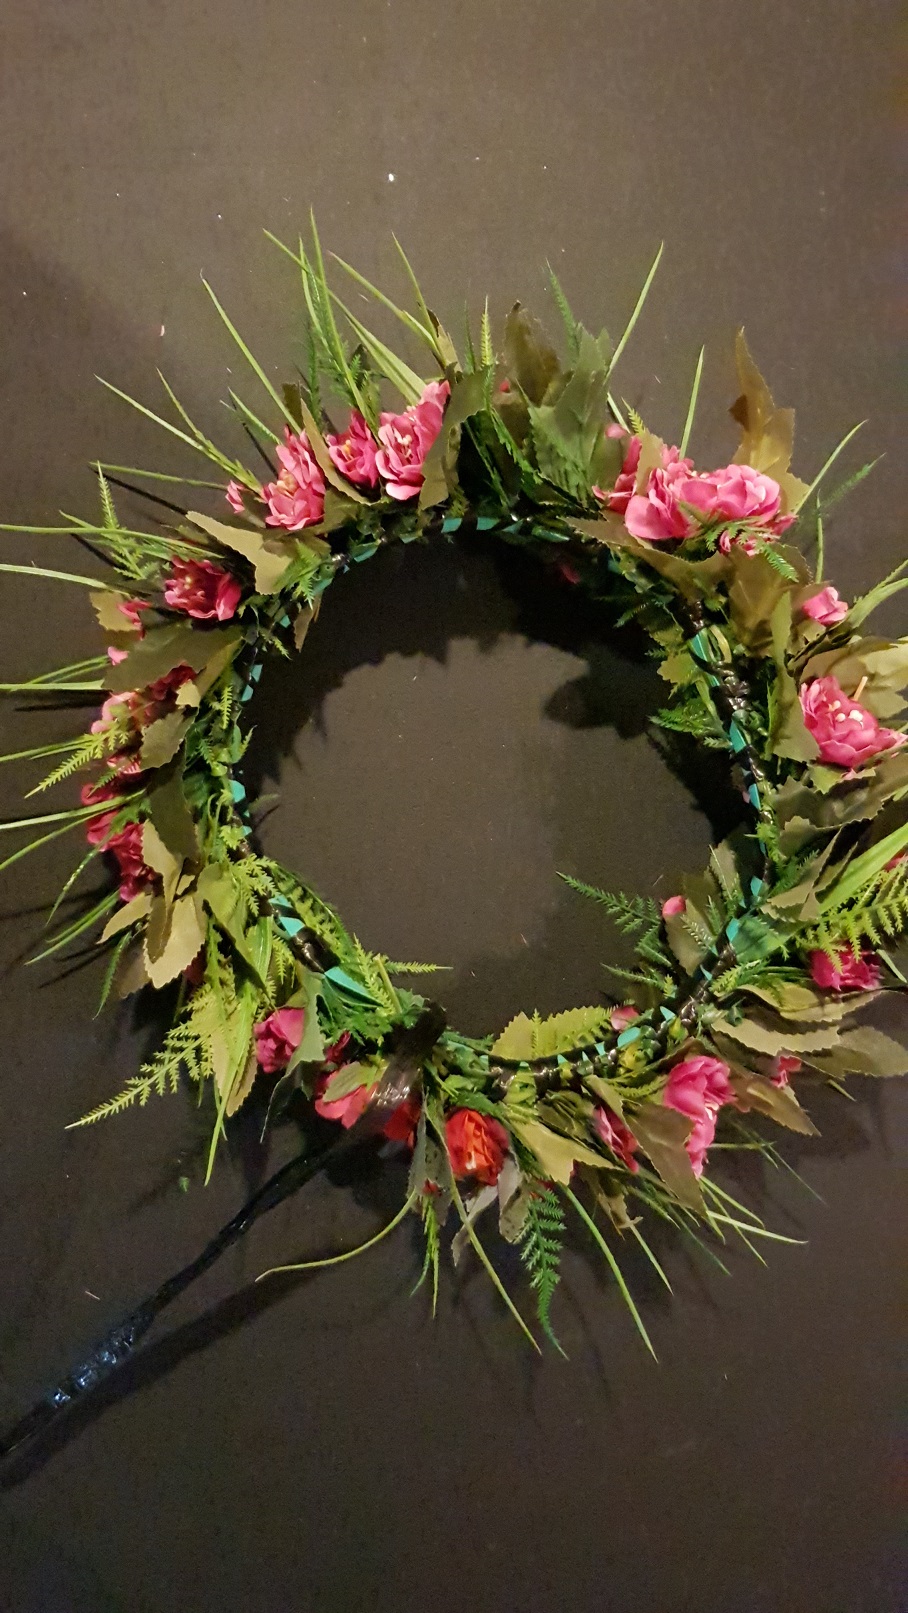
Once you have completed everything, you can wear your ‘ei katu with a smile 🙂
And that is your tutorial DONE.
I hope that this inspires anyone who’s wanting to learn how to make an Ei Katu, whos wanting to know a bit more about the Cook Island culture or who wants to share their talents as well.
I also hope this inspires anyone and everyone to follow their dreams.


Recent Comments